Since Quamby Bluff is a half-day return hike rather than a multi-day trip, here is a section-by-section breakdown of the trail instead of a day-by-day itinerary.
Section 1: Car Park to Rainforest (0-1km, ~20 minutes)
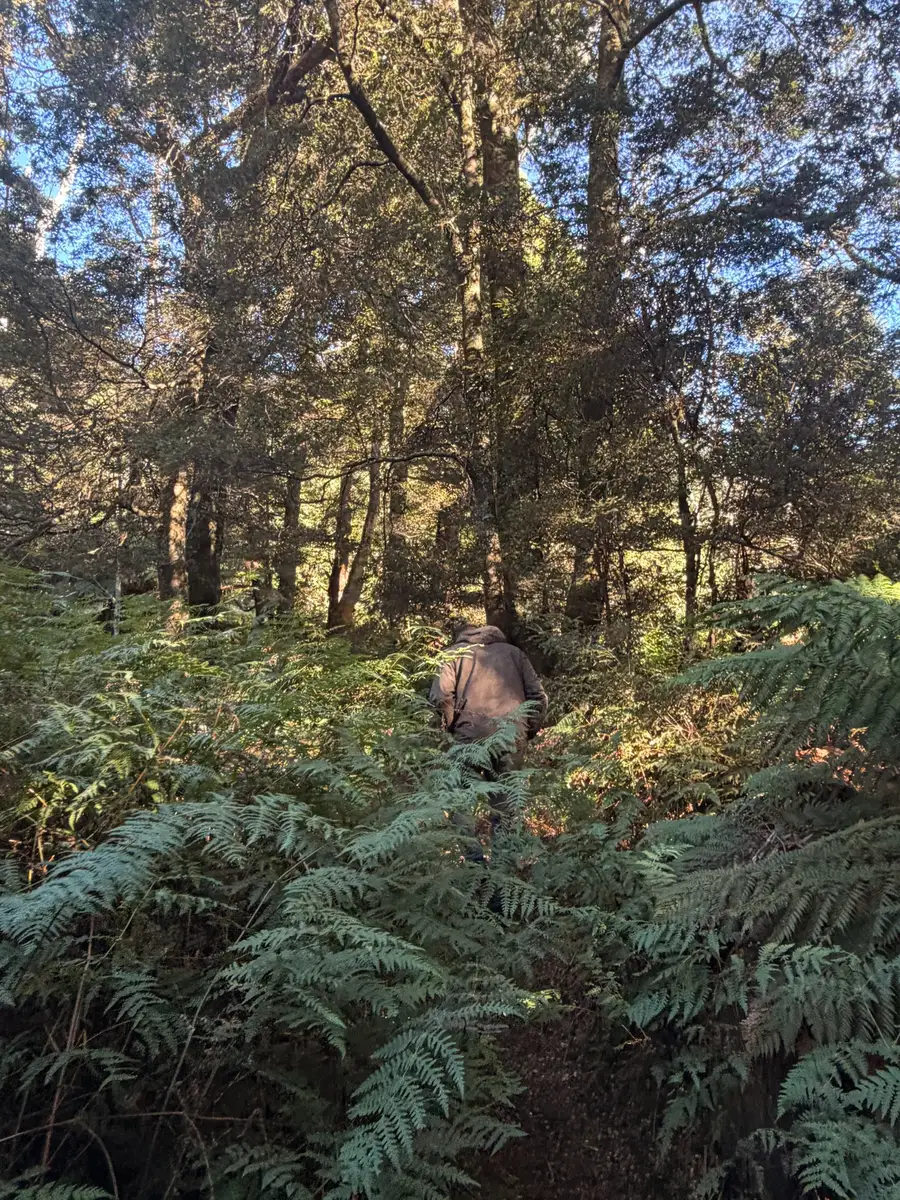
The trail starts from the small gravel car park and follows a clear path past blue walker's posts. You pass near the Bodhicitta Dakini Monastery property boundary (stay on the marked trail) and enter eucalypt forest almost immediately. The air changes. It smells like damp earth and eucalyptus.
The path is mostly flat here with some gentle incline. Ferns shoulder-high on both sides. The canopy overhead is thick enough to keep you cool even on a warm day, with sunlight breaking through in patches that make the whole forest glow. This is the section where we spotted the potoroo darting through undergrowth first thing in the morning, and the native rat sitting in the middle of the path about 15 minutes in, completely unbothered. Keep your eyes on the ground cover here, you might see something.
There was evidence of mud at the start of the trail even in our dry conditions. In winter or after rain this section would get boggy. Gaiters would be smart in the wet months.
Terrain: Dirt path, some exposed tree roots, occasional mud near the start.
Water: None available. Bring your own.
Highlights: Wildlife spotting, fungi on tree trunks, beautiful forest light.
Section 2: Rainforest to Boulder Field (1-2km, ~30 minutes)
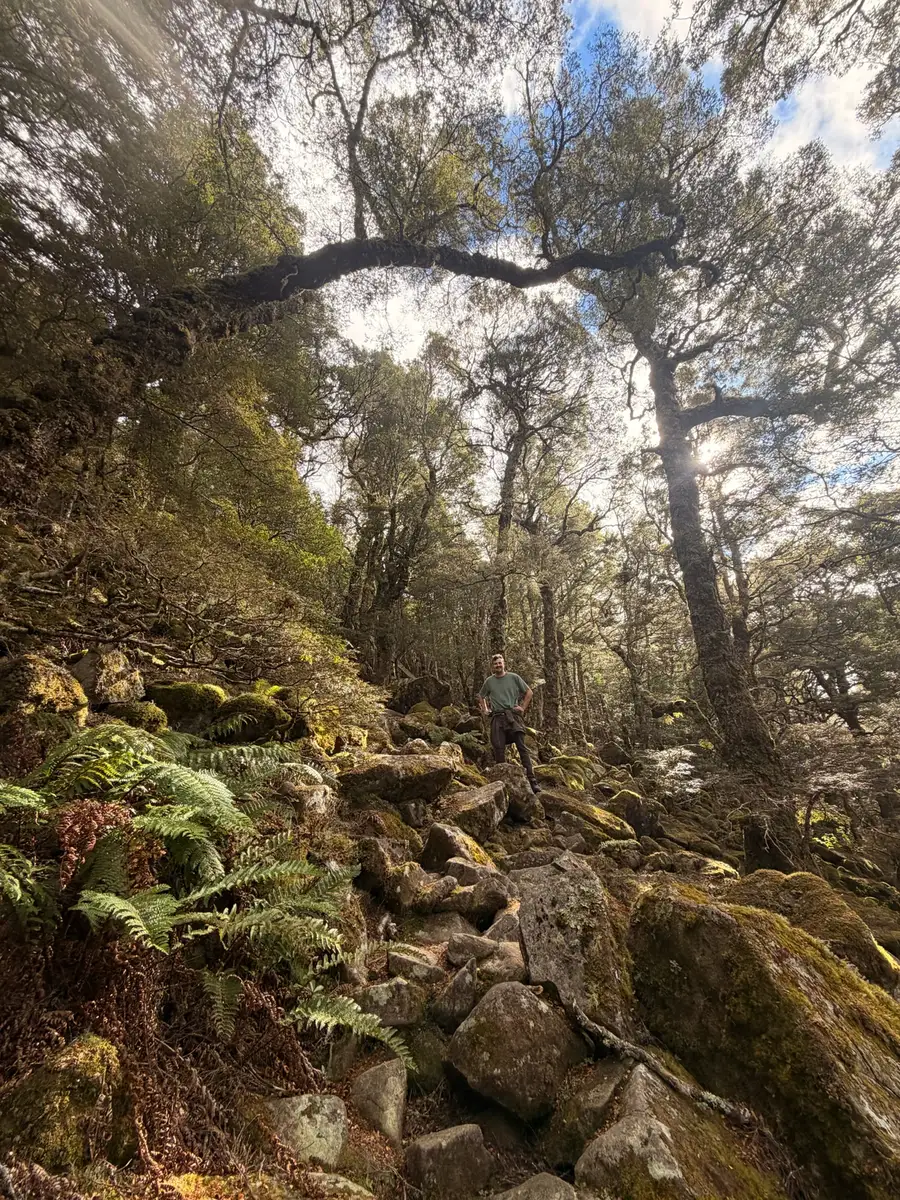
The trail begins to climb more steeply. The forest transitions from open eucalypt to denser myrtle rainforest with moss-draped trees. The path becomes rockier with natural stone steps and larger boulders to navigate around. This is where you start to earn your elevation.
The red trail markers become more important through here. The path is not always obvious among the rocks and roots. A couple of spots could trip you up if you are not watching your feet.
Terrain: Rocky, stepped, moderate incline. Hands useful for balance in places.
Highlights: Mossy old-growth trees, lichen colonies, transition from eucalypt to rainforest.
Section 3: The Boulder Field (2-2.5km, ~20-30 minutes)
This is where Quamby Bluff separates itself from an ordinary forest walk. The trees thin out and suddenly you are standing at the bottom of a massive field of dark dolerite boulders flowing down from the summit. It looks intimidating. It is not as bad as it looks, but it is the section that will sort out who is comfortable on rough ground and who is not.
There is no defined path. You pick your route, hopping from boulder to boulder, using your hands when needed. Some of the rocks wobble. Test before you commit. The scramble is about 5 to 10 minutes of sustained effort. It is not vertical climbing, but it is genuinely physical and you will use your arms.
A lone eucalyptus tree about halfway up the scree makes a good rest point and landmark. Stop here, turn around, and take a photo. The view behind you is already worth the effort.
We saw a couple of groups turn back at this point. No shame in that if scrambling is not your thing. The rainforest walk below is beautiful on its own.
Terrain: Loose boulders, no defined track, hands required. Take it slow.
Hazards: Twisted ankles are the main risk. Do not rush. Would be dangerous when wet.
Highlights: The views start opening up dramatically. Every time you look back, more of northern Tasmania has appeared.
Section 4: Summit Approach and Dolerite Columns (2.5-3km, ~20-30 minutes)
After the boulder field, you re-enter scrubby forest briefly before reaching the dolerite column formations near the summit. These tall stone pillars are impressive. The trail weaves between them and there are two or three spots where you need to use your hands to pull yourself up short rock faces (1 to 2 metres).
Terrain: Rock, scrub, short climbs. Confident footwork needed.
Hazards: Do not attempt in wet conditions. The rock would be very slippery.
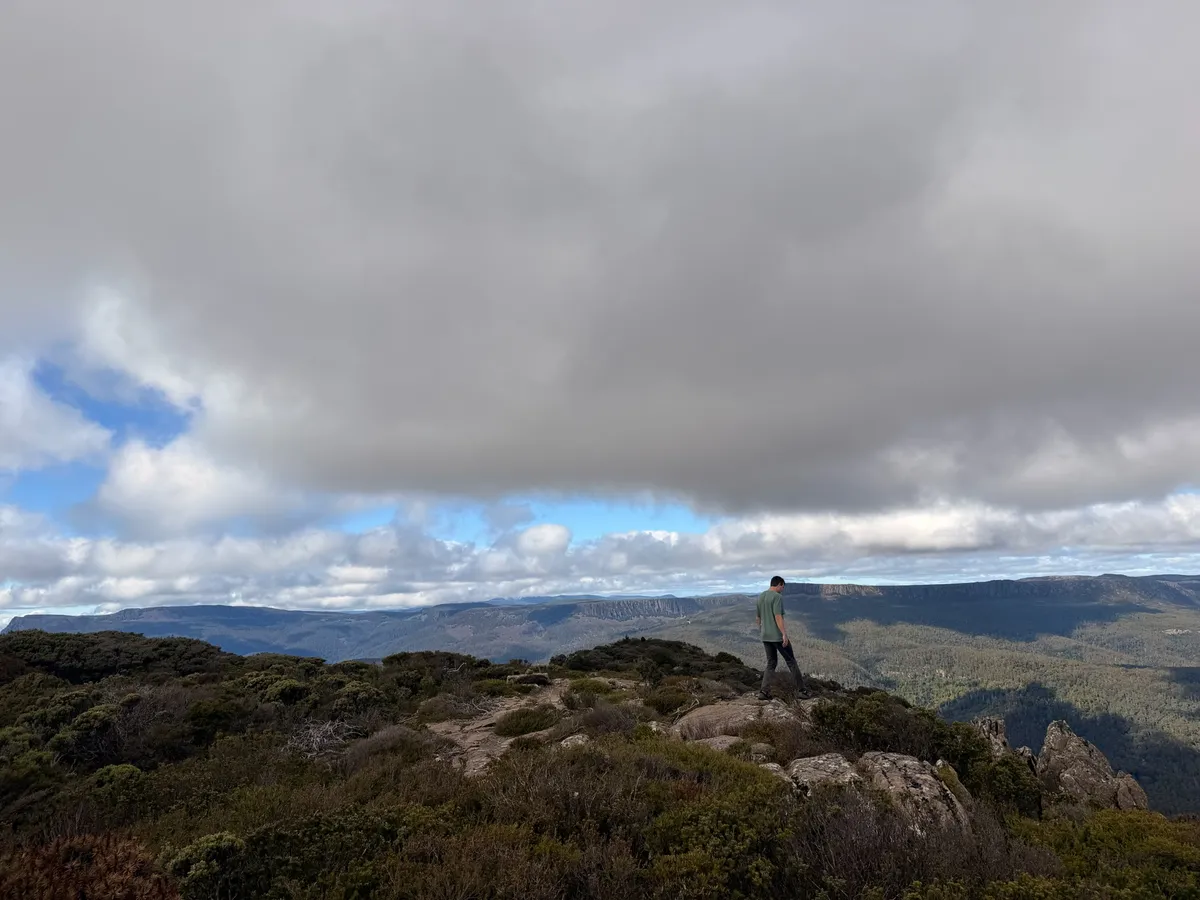
Section 5: The Summit Plateau (3km mark, 20+ minutes recommended)
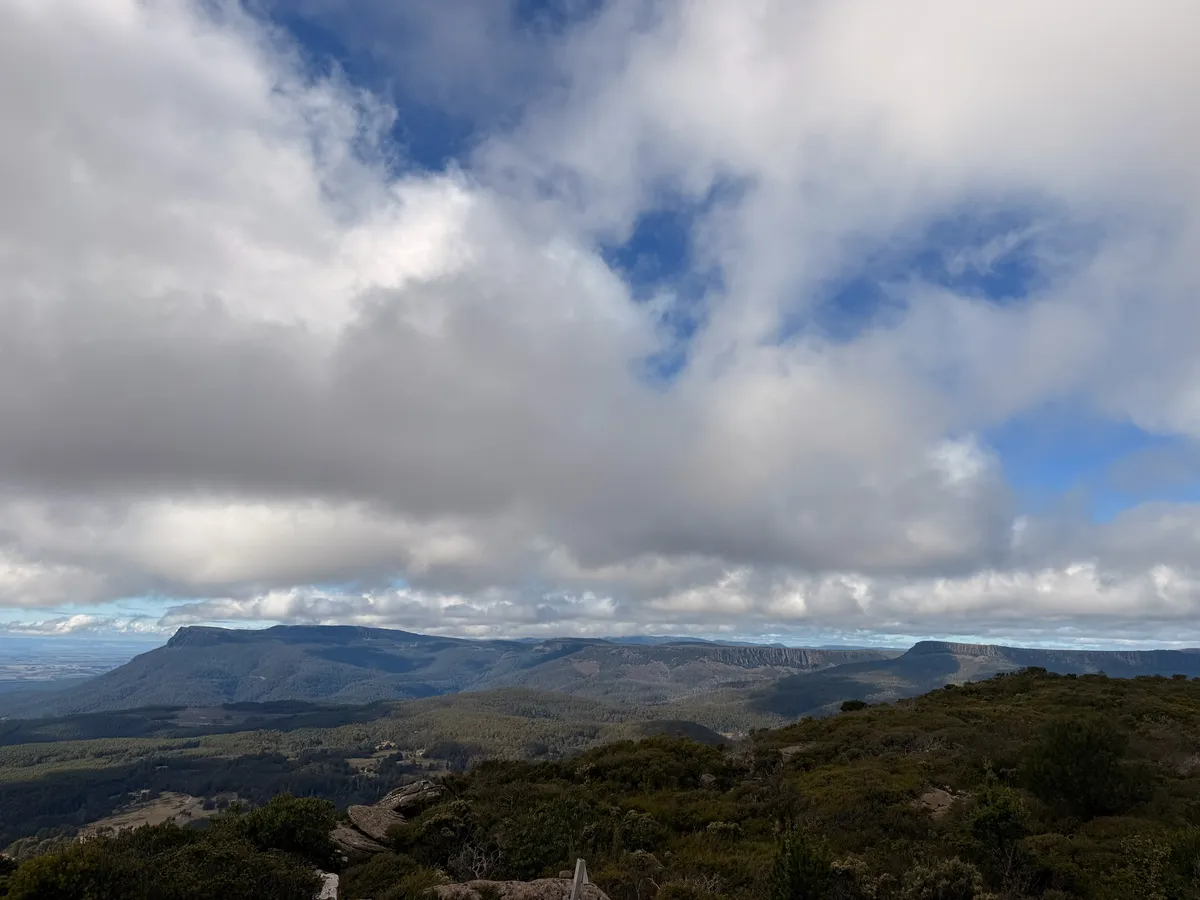
You emerge onto a broad alpine plateau at 1,227m. The views extend in every direction. On a clear day you can see Bass Strait to the north and the central highlands to the south. The Great Western Tiers stretch along the horizon like a fortress wall.
Spend time up here. Find a rock, sit down, eat something. The wind can be strong so layer up. The alpine plants are low and spiky, so long pants or leggings are recommended if you want to explore off the main route.
Terrain: Open plateau, low scrub, exposed to wind.
Highlights: 360-degree panorama, alpine plants, excellent photography.
Section 6: The Descent (3km return, ~1.5 hours)
Retrace your steps. The descent takes about 1.5 hours compared to roughly 1 hour 45 minutes going up. The boulder field is trickier on the way down because you are stepping downward onto uneven surfaces. Take it slowly.
Summary Table
| Section | Distance | Time (up) | Terrain | Difficulty |
|---|---|---|---|---|
| Car park to rainforest | 1km | 20 min | Flat, dirt | Easy |
| Rainforest climb | 1km | 30 min | Rocky, stepped | Moderate |
| Boulder field | 0.5km | 20-30 min | Boulders, scrambling | Hard |
| Summit approach | 0.5km | 20-30 min | Rock columns, climbing | Hard |
| Summit plateau | At summit | 20+ min rest | Open, windy | Easy (flat) |
| Total one way | 3km | ~1.5-2hrs | Grade 3 | |
| Total return | 6km | ~3-5hrs |
If You Only Have 2 Hours
You can hike to the base of the boulder field and back in about 2 hours. The rainforest section alone is worth doing. You will not get the summit views, but you will get the wildlife, the fungi, and the beautiful forest. Good option if you have young kids or just want a shorter walk.
New dispatches from the field
Real stories. No spam. Unsubscribe anytime.