Gear: What Works, What Fails, and Why It Matters
The single biggest difference between my first trip being miserable and my second trip being manageable was gear. I replaced almost everything between the two trips. This South Coast Track gear list is based on what I actually used across both hikes, what failed, and what I'd buy again.
Your gear is literally the difference between success and suffering on the South Coast Track. I'm being specific about brands and models because vague gear advice is useless when you're standing in a shop trying to decide between three options.
Footwear: Non-negotiable
I wore Solomons on both trips. Same boots, both times. They're not the most expensive hiking boots, but they work. The gore-tex keeps your feet dry in constant wet. The ankle support prevents the kind of rolling that causes injuries. The grip is solid on slippery rock.
Total cost: around $200 to $300. This is non-negotiable. Cheap boots fail. Your feet swell in wet conditions and cheap boots become painful. Good boots are an investment that pays off by hour 20 of walking.
I know people who swear by other brands. Merrell, La Sportiva, Scarpa. The critical features are: gore-tex lining, ankle support, good grip on wet surfaces, comfortable after break-in. I tried on probably eight pairs before settling on the Salomons. Went to a proper hiking shop in Brisbane, told them what I was doing, and they fitted me properly. That fitting process took 45 minutes and it was 45 minutes well spent. Your boot choice determines whether you enjoy or endure this track.
Do not do the South Coast Track in shoes. Do not do it in ultra-light trail runners. Do not do it in boots you haven't tested. Break in your boots before you arrive. Blisters on day one means suffering for nine more days.
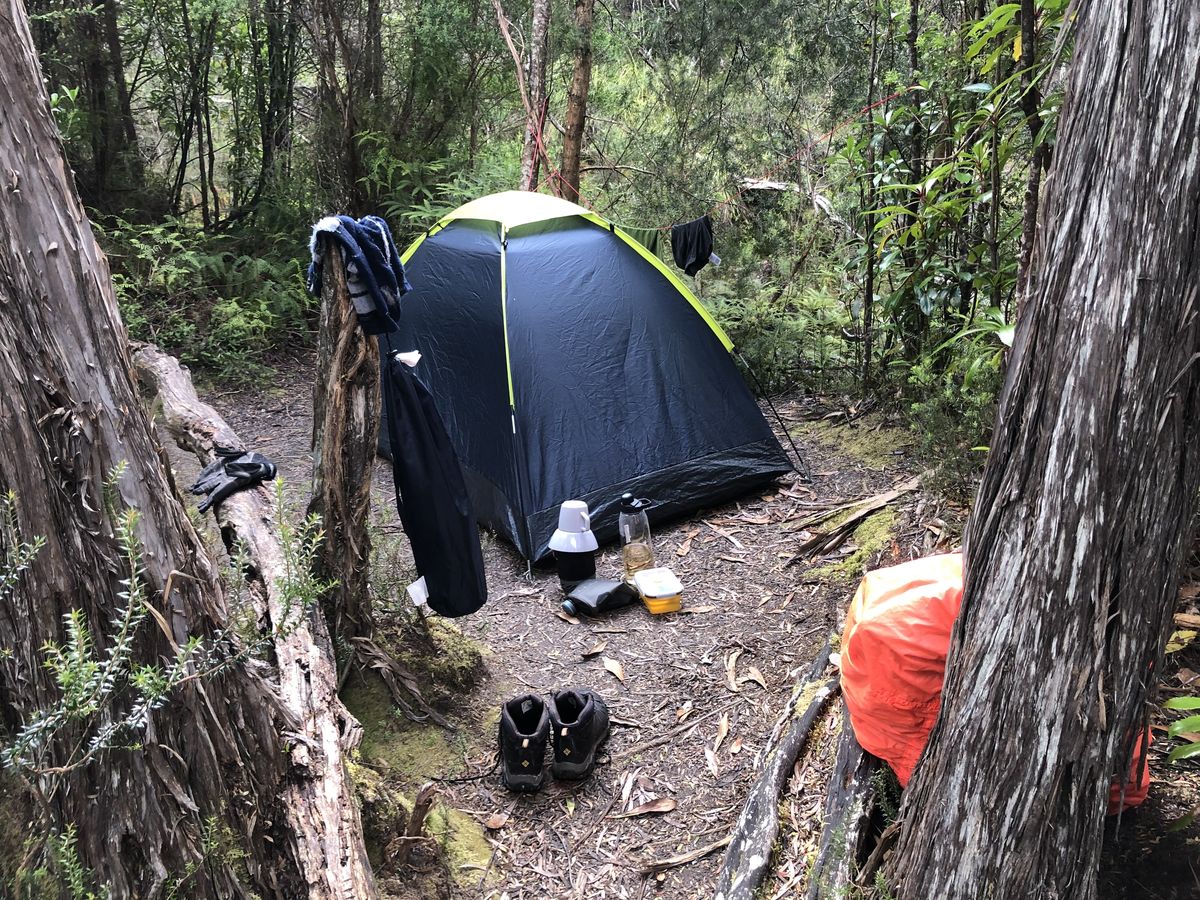
Shelter: Upgrade From My First Mistake
My first tent was from Kmart. It leaked. Constantly. It had one pole and the design meant rain would pool on any slope. I spent 10 nights in a leaking tent. This was a serious mistake.
The second time, I upgraded to a proper 2-person hiking tent. The MSR Hubba Hubba is industry standard for good reason. It's light, it doesn't leak, it breathes enough to reduce condensation, and it's tough enough for Tasmania's weather.
Cost: around $400 to $600. This is expensive compared to a Kmart tent. It's cheap compared to 10 nights of wet misery.
Important: a 1-person tent is possible if you're solo, but 2-person tents are more comfortable for the same weight. The interior space helps reduce claustrophobia on a rainy day.
Do not cheap out on your tent. The track is guaranteed to be wet. Your tent is your shelter. Get one that actually keeps water out.
Sleeping Bag: Temperature Rating Matters
My first sleeping bag was rated to 15 degrees Celsius. The actual temperatures on the South Coast Track in January were dropping to 8-10 degrees at night. This was a critical error.
For the South Coast Track, minimum should be a 10-degree bag, ideally 5-degree. The Sea to Summit Spark series is light and compresses well. For a 5-degree rated bag, you're looking at $400 to $500.
The discomfort of being cold all night is not worth saving $200 on a sleeping bag. You'll sleep poorly, you won't recover, your energy will be depleted, and everything becomes harder.
I've heard people succeed with 15-degree bags by sleeping in thermals and using other layers. I didn't succeed. My first night was dreadful. Get a 5-degree bag.
Sleeping Mat: Essential, Not Optional
Kathmandu inflatable sleeping mat
A good sleeping mat serves two purposes: insulation from the ground and comfort. The ground is cold. If you're only separated by a thin mat, the heat drains from your body into the earth all night.
The Kathmandu inflatable mat I used was crucial. It lifted me off the ground. It provided insulation. It was comfortable enough to actually sleep on.
Cost: around $150 to $200.
Do not bring a cheap foam mat. Do not bring a yoga mat. Bring a hiking-specific inflatable mat. Your sleep quality, and thus your recovery, depends on this.
Backpack: Capacity and Fit
A 65-litre pack is about right for the South Coast Track. You're carrying 10 days of food, shelter, clothing, and cooking gear. The Osprey Atmos is designed specifically for hiking and the AG (anti-gravity) suspension is worth the cost.
Cost: around $400 to $500.
The critical thing is fit. A pack that doesn't fit your body will destroy your shoulders and back. Go to a proper hiking shop and get fitted. The pack should sit on your hip belt, not your shoulders. The shoulder straps should distribute weight evenly.
A poorly fitting pack turns a hike into torture. A well-fitting pack makes the same hike manageable.
I used the same pack for both trips because it fit correctly and it worked. Even with a hole in it (which is ridiculous and I should have fixed), it was functional.
Base Layers: Merino is Worth It
Icebreaker Merino base layers
Merino wool is expensive compared to polyester or cotton. Merino is worth it because it regulates temperature, it resists smell even when wet, and it's comfortable for days-long hiking.
I brought merino tops and bottoms, both long. Cost: around $100 to $150 for the pair.
Cotton is death on a multi-day hike. It absorbs water, it loses insulation when wet, and it smells terrible. Polyester works but merino is better.
Bring at least two sets so you can rotate. One set gets washed in the stream, dries slowly, while you wear the other.
Rain Jacket and Pants
Anaconda rain jacket
A proper rain jacket is critical. I can't remember the exact brand of the one I used from Anaconda, but it was waterproof, breathable, and actually kept rain out.
Cost: around $150 to $250.
Rain pants are debatable. Many people skip them and just use waterproof shorts or accept wet legs. I brought lightweight rain pants the second time and they were useful.
The key is breathability. A non-breathable rain jacket will cause condensation inside that makes you as wet as the outside rain. Gore-tex or equivalent technology is worth the cost.
Socks: Wool
Generic wool socks
Bring wool socks. Lots of them. I brought probably six pairs and rotated them. Cost: around $50 to $80 for a six-pack of good hiking socks.
Your feet will be wet constantly. Wool socks maintain insulation even when wet. They prevent blisters better than other materials. After 10 days, your feet will be wrecked anyway, but good socks minimise the damage.
Water Filtration
A simple lightweight filter like a Sawyer Mini cost $25 to $40. Every water source on the South Coast Track needs filtering. Do not skip this. Giardia is present.
Cooking Gear
Bring a lightweight camping stove and pot. I used a basic setup. Cost: around $40 to $80. You could bring a jetboil for around $150 but the basics work fine.
You'll cook dehydrated meals or pasta. Bring fuel for 10 days of cooking. Budget roughly 300 grams of fuel.
Food Bag and Hanging
You need dry bags for food storage. Multiple dry bags so you can hang food every night without risk of wildlife damage. Cost: around $50 to $100 for several quality bags.
Also bring rope or paracord (20 to 30 metres) for hanging food. Cost: around $10.
Navigation
John Chapman South Coast Track guidebook
The guidebook is worth buying. It has maps, elevation profiles, distance/time estimates (which are underestimated), and detailed descriptions of each section. Cost: around $25 to $35.
Bring a basic compass and be able to navigate by map. GPS is unreliable in dense forest. The track is marked but clear landmarks help.
Other Critical Items
- Headlamp: essential for camp setup in dim light. Cost: $20 to $50.
- Repair kit: basic sewing, duct tape, safety pins, spare shoelace. Cost: $15.
- Toilet paper and trowel: for Leave No Trace. Cost: $10.
- Sunscreen and insect repellent: Cost: $15.
- Blister treatment: essential. Cost: $15.
- Basic first aid: bandages, pain relief, blister prevention. Cost: $30 to $50.
- Head strap for headlamp: Cost: $10.
- Lighter and waterproof matches: Cost: $10.
What I Brought But Didn't Need
A fishing rod. I brought one on my first trip thinking I could supplement my food supply with fresh fish. Ten days, zero fish. The rod weighed about 400 grams and took up space in my pack that could have been used for actual food. The rivers and beaches on the South Coast Track might have fish in them, but I wasn't catching any while exhausted and cold. Don't bring this.
A full camping pillow. I used a stuffed dry bag as a pillow and it was fine. Stuff your spare clothes into a dry bag, shape it, done. Save the weight and the $30.
Extra clothing beyond what I described. I brought three t-shirts on my first trip. I wore one. The other two sat in my pack, wet, adding weight. Two sets of base layers and one set of rain gear is enough. More than you think is excess, less than you think is dangerous. Aim for the minimum that keeps you warm and dry, and accept that "dry" is relative on this track.
A book. I thought I'd read at camp. I was too tired to read. My headlamp battery was too valuable to waste on reading. If you want entertainment, bring a journal and write instead. The memories are worth capturing while they're fresh. I wish I'd kept a journal on my first trip.
Total Gear Cost Breakdown
If you have nothing and are buying everything new: - Boots: $250 - Tent: $500 - Sleeping bag: $450 - Sleeping mat: $180 - Backpack: $450 - Base layers: $140 - Rain jacket: $200 - Socks (multiple pairs): $70 - Water filter: $40 - Cooking gear: $80 - Dry bags: $80 - Guidebook: $30 - Miscellaneous (lights, repairs, first aid, etc): $150
Total: approximately $2,600 to $3,000
If you already have moderate camping gear: Budget $800 to $1,200 for upgrades (better tent, sleeping bag, hiking-specific pack).
Important items that justify the cost: All of it. These aren't luxury items. They're the difference between a challenging hike and a dangerous, miserable experience.
I've read of people succeeding with cheaper gear. I succeeded on my first trip with bad gear because I'm young and stubborn. I wouldn't recommend it. Spend the money, get good gear, have a better experience.
The Weight Question
Your total pack weight matters more than most people realise. Every extra kilogram compounds over 86 kilometres. My first trip, I was probably carrying 24 to 25 kilograms because I packed emotionally (fishing rod, camping pillow, too many clothes). My second trip, I cut that to about 20 kilograms by being ruthless.
The difference was noticeable from kilometre one. Less weight means less strain on your knees during descents, less shoulder fatigue, and faster movement. You arrive at camp less exhausted and recover faster overnight.
If you're new to multi-day hiking, weigh everything before you pack it. Lay it all out, weigh each item, and ask yourself honestly whether you need it. If the answer is "maybe," leave it behind. The South Coast Track rewards light packing and punishes excess.
One tip that saved me weight on trip two: decant everything. Toothpaste into a small tube. Sunscreen into a travel bottle. First aid into a single ziplock bag instead of the full kit box. These small reductions add up across 30+ items and the cumulative weight saving was probably 500 grams. That's a snack bar's worth of weight freed up, and at day seven you'll wish you had that extra snack bar.
Where to Buy Gear in Australia
If you're in Brisbane, I'd recommend going to Paddy Pallin or Kathmandu for the big items (tent, pack, sleeping bag). Both have staff who hike and can fit you properly. Anaconda is good for the smaller items like dry bags, cooking gear, and accessories, and they're cheaper on those items.
Online, Amazon AU has competitive pricing on brands like Sea to Summit and Osprey. But for boots, go in-store. You need to try them on and walk around. Same for packs. The fit matters more than the brand.
New dispatches from the field
Real stories. No spam. Unsubscribe anytime.